Want to multiply your spider plants without any fuss? Water propagation is one of the easiest ways to grow new plants from healthy spiderettes.
Plus, watching fresh roots appear in a glass jar is always rewarding. Here’s my full step-by-step method to root spider plants in water at home — with practical tips and real science to back it up.
Key Takeaways
- Spider plants root easily in water — thanks to their natural resilience and baby plantlets with root nubs.
- Use clean jars and fresh water to prevent bacteria and ensure healthy root growth.
- Bright, indirect light speeds up rooting without burning delicate leaves.
- Roots appear in 1–3 weeks — change water regularly and watch for roots to reach 2 inches.
- Transfer to soil gently once roots are strong for long-term growth and thriving new plants.
Table of Contents
- Key Takeaways
- Why Propagate Spider Plants In Water?
- Spider Plant Water Propagation: Step-By-Step Guide
- How To Identify Healthy Spider Plant Babies (Spiderettes)
- How To Cut Spider Plant Babies For Water Propagation
- How To Place Spider Plant Cuttings In Water
- How Long Does It Take For Spider Plants To Root In Water?
- How To Transfer Spider Plant Cuttings From Water To Soil
- Common Problems With Spider Plant Water Propagation
- FAQs About Propagating Spider Plants In Water
- Final Tips For Successful Spider Plant Propagation
- Related Guides
Why Propagate Spider Plants In Water?
Water propagation is a simple, low-mess way to root spider plant babies. This method lets you observe root growth and spot issues early.
Spider Plant Water Propagation: Step-By-Step Guide
Follow these clear steps to propagate your spider plant in water. This practical guide makes it super easy, even if you’re new to houseplants.
- Pick A Healthy Spiderette: Choose a baby plant with firm green leaves and tiny root nubs underneath.
- Sterilize Your Tools: Wipe your scissors with rubbing alcohol to prevent spreading disease.
- Snip The Spiderette: Cut the baby from the runner, leaving about an inch of stem attached.
- Fill A Glass Jar: Use a clean, clear jar or vase with filtered or dechlorinated water.
- Place The Cutting In Water: Submerge only the root end — leaves should stay above the water line.
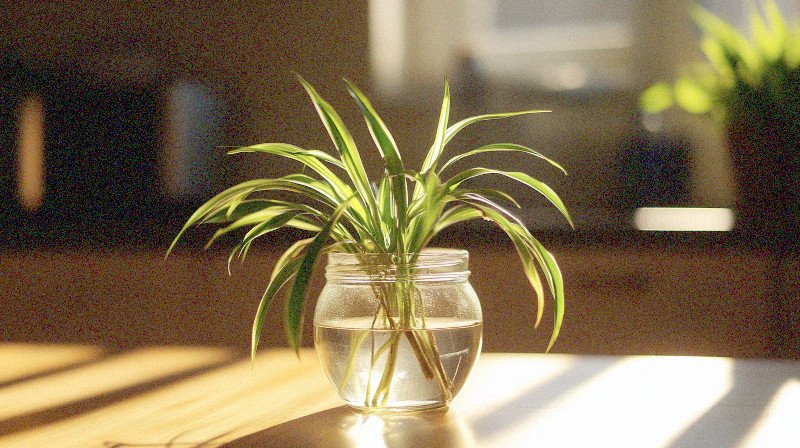
- Set In Bright Indirect Light: Place the jar on a windowsill with plenty of indirect sunlight, not direct hot sun.
- Change Water Every Few Days: Fresh water keeps bacteria and mold away, helping roots grow faster.
- Wait For Roots: Watch for roots to reach about 2 inches long, usually within 2–3 weeks.
- Transfer To Soil: Once roots are sturdy, pot your new plant in fresh potting soil and water it in gently.
How To Identify Healthy Spider Plant Babies (Spiderettes)
Look for spiderettes with visible tiny root nubs at the base.
Their leaves should be firm and green — no signs of yellowing or mushy spots. Healthy babies usually dangle from the long runners your mother plant sends out.
How To Cut Spider Plant Babies For Water Propagation
Use sterilized scissors to snip the spiderette from the runner.
Make a clean cut about an inch above where the baby connects to the stem. Always sterilize your tool to prevent introducing disease to the mother plant.
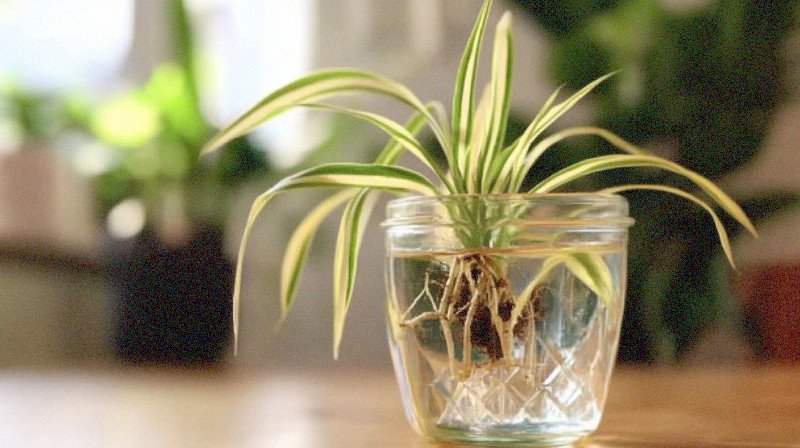
How To Place Spider Plant Cuttings In Water
Fill a glass jar with room-temperature water and place the spiderette so only the base sits in water — never submerge the leaves.
Place the jar in bright, indirect light. Avoid direct sun that might overheat the water and stress the cutting.
How Long Does It Take For Spider Plants To Root In Water?
Spiderettes usually show new root growth in 7–14 days.
I like to change the water every few days to prevent stagnation and bacterial build-up. When roots reach about 2 inches long, they’re ready for soil.
How To Transfer Spider Plant Cuttings From Water To Soil
Fill a small pot with well-draining potting mix. Make a hole and gently tuck in the rooted spiderette.
Firm the soil lightly around the roots and water thoroughly. Keep the new plant in a warm, bright spot out of direct sun for the first week to help it settle in.
Common Problems With Spider Plant Water Propagation
Yellowing leaves usually mean the water is dirty or the cutting got too much sun.
Mold or algae? That’s a sign the water needs changing more often. If roots aren’t forming, double-check the light conditions and make sure the cutting stays healthy.
How To Fix Rooting Problems
Change the water every 3–5 days. Use a clean glass each time. Place the jar where it gets bright, indirect light but stays cool.
If you’re curious about soil health for indoor plants, check my guide on making homemade fertilizer, it pairs well with healthy spider plants too.
FAQs About Propagating Spider Plants In Water
Can Spider Plants Live In Water Forever?
Technically yes, but they’ll grow healthier in soil long-term. Roots submerged in water too long may weaken over time.
Is Tap Water Safe For Spider Plants?
Tap water works but let it sit out overnight to allow chlorine to dissipate. Filtered water is best if your tap water is heavily treated.
Should You Use Fertilizer Or Rooting Hormone?
It’s not required, but a mild rooting hormone can help speed up the process, especially for smaller, weaker babies.
Final Tips For Successful Spider Plant Propagation
Keep your jars in a bright, warm place away from drafts. Watch the roots grow — it’s one of my favorite parts of indoor gardening! Once your new plants are thriving in soil, you can even use them to brighten shady spots. For more easy houseplants, see my guide to the easiest herbs to grow indoors.
Related Guides
- Should I Cut The Brown Tips Off My Spider Plant?
- How To Make Homemade Fertilizer For Indoor Plants
- Easiest Herbs To Grow Indoors
I'm George Brown, a passionate gardener and the founder of UrbanLeafy.com. I love helping beginners grow fresh herbs, plants and greenery, whether on a windowsill, in a garden or a tiny balcony. My practical, no-fluff tips have been featured in Homes & Gardens, Livingetc, and Best Life, and are rooted in years of real experience. If you're ready to turn your space into a thriving herb haven, you’re in the right place.

